Cropster Cafe Onboarding

Table of Contents
Overview
This article provides an overview of Cropster Cafe and outlines the essential steps to help you get started effectively.
Introducing Cropster Cafe
Cropster Cafe is an all-in-one solution designed specifically for cafes. It streamlines the processes of coffee quality management and retail operations.
Via the Operations Fleet Dashboard, you can:
- Add a new espresso machine and check the installation status.
- Access more Cafe-related Helpdesk articles and/or contact our Customer Support Team.
- Review our latest releases and enhancements.
- View the following KPI cards: Machines online, Connected Machines, and Locations.
-
Navigate directly to the Telemetry Insights and/or Inventory Insights.

Discovering the ideal workflow
For a seamless experience, we recommend following these steps in the specified sequence.
- Select your location
- Choose a connection type
- Set up the espresso machine
- Connect the espresso machine
- Create Recipes
- Assign Recipes to Groupheads/Buttons
- Creating a Reference Brew
Selecting your location
Espresso machines can only be added to locations designated with the "Cafe" attribute.
You can designate the appropriate location type by following the detailed instructions provided here.
-
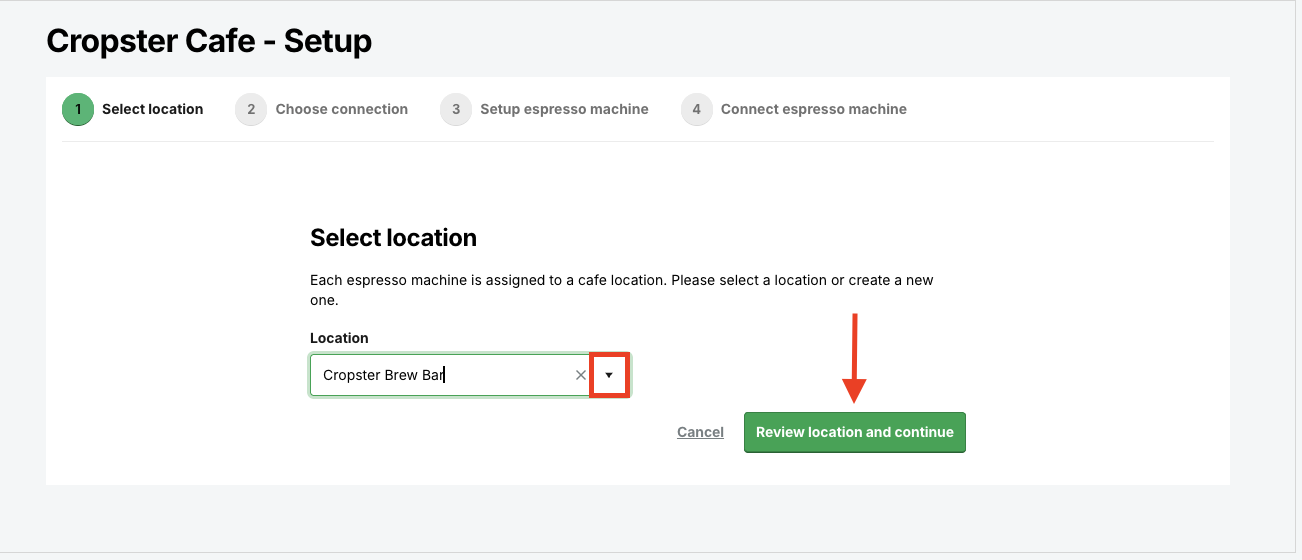
By clicking on the dropdown next to Location, you can either:
- Select an existing location from all locations with the “Cafe” attribute.
- Create a new location.
-
After selecting either an existing location or creating a new one, click on the green Review location and continue button.
-
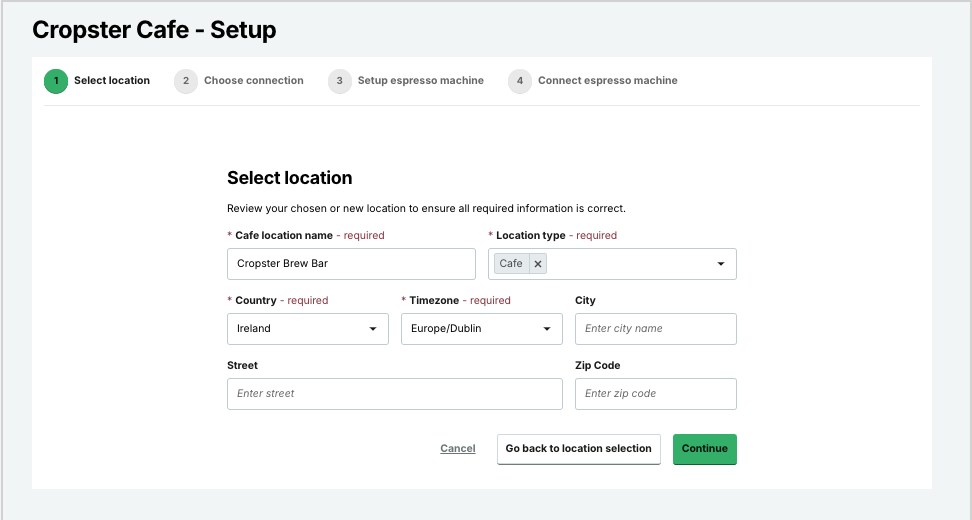
Verify that the details of your selected or newly created location are accurate and complete.
-
If you decide to create a new location, enter the following details:
* Indicates mandatory fields.- *Cafe location name
- *Location type
- *Country
- *Time zone
- City
- Street
- Zip Code
- You can either go back to the location selection or click on the green Continue button to proceed.
Choosing a connection type
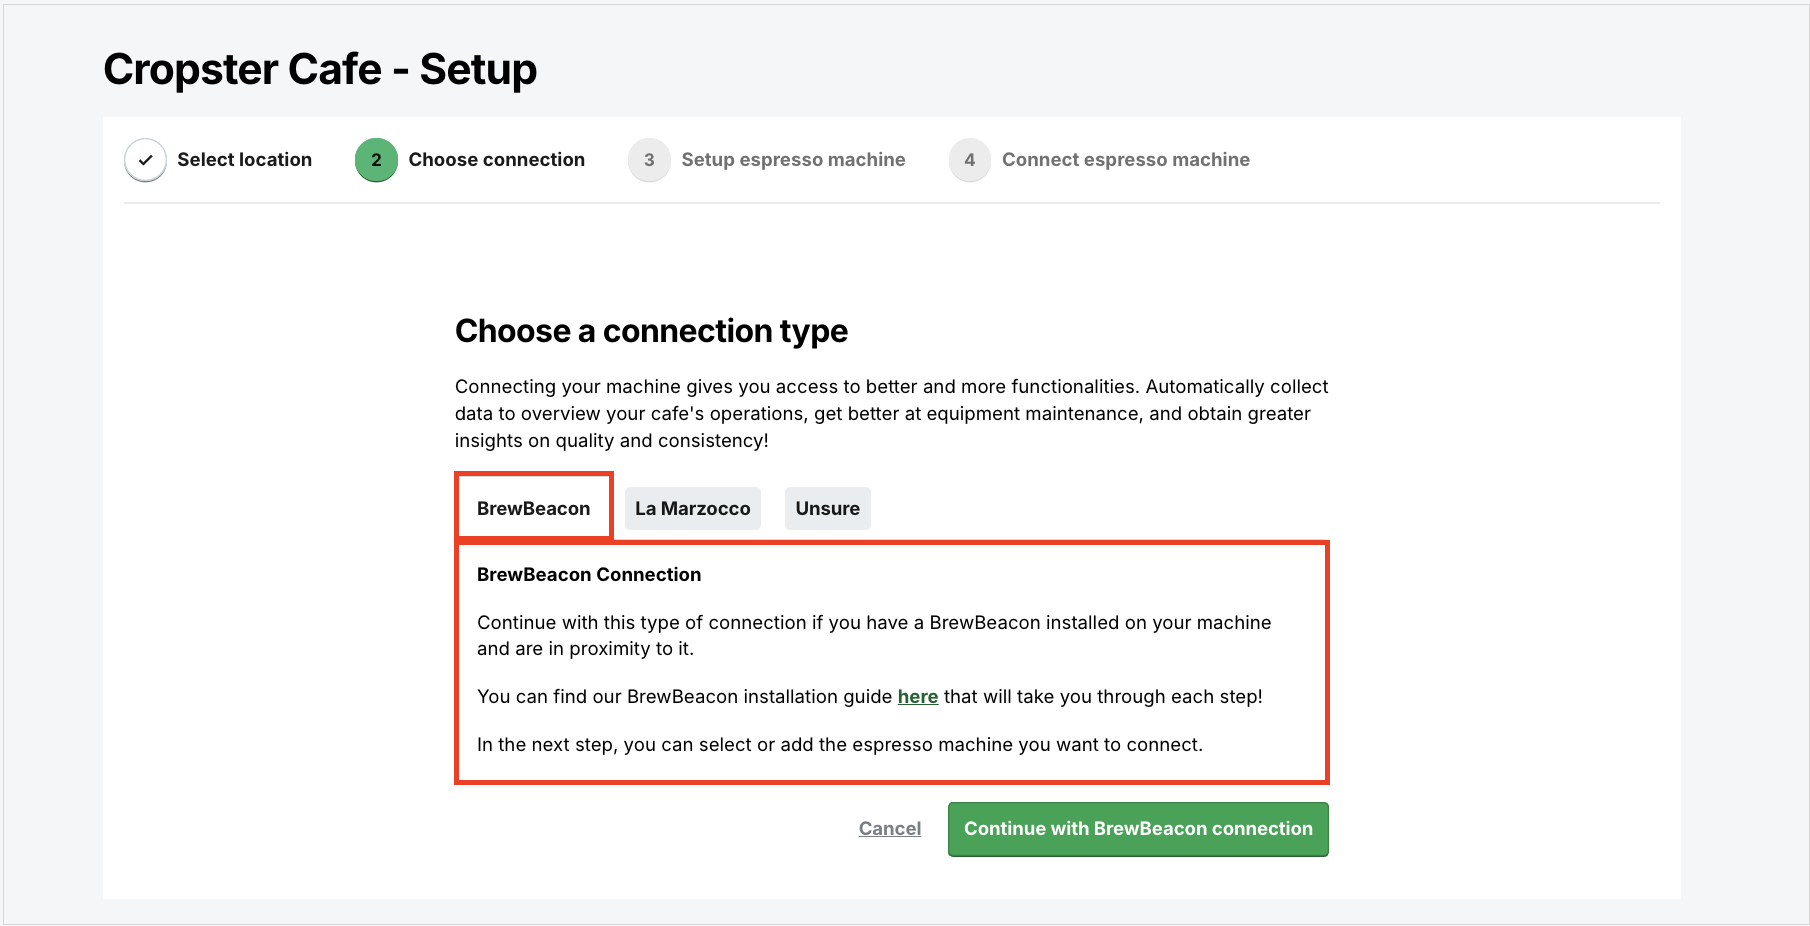
Connecting your espresso machine enhances your cafe's capabilities and functionalities.
It enables automatic data collection, providing insights into operations, improving equipment maintenance, and enhancing brewing consistency and quality.
You have the option to choose from three different connection methods:
-
BrewBeacon connection: Continue with this type of connection if you have a BrewBeacon installed on your machine and are in proximity to it.
-
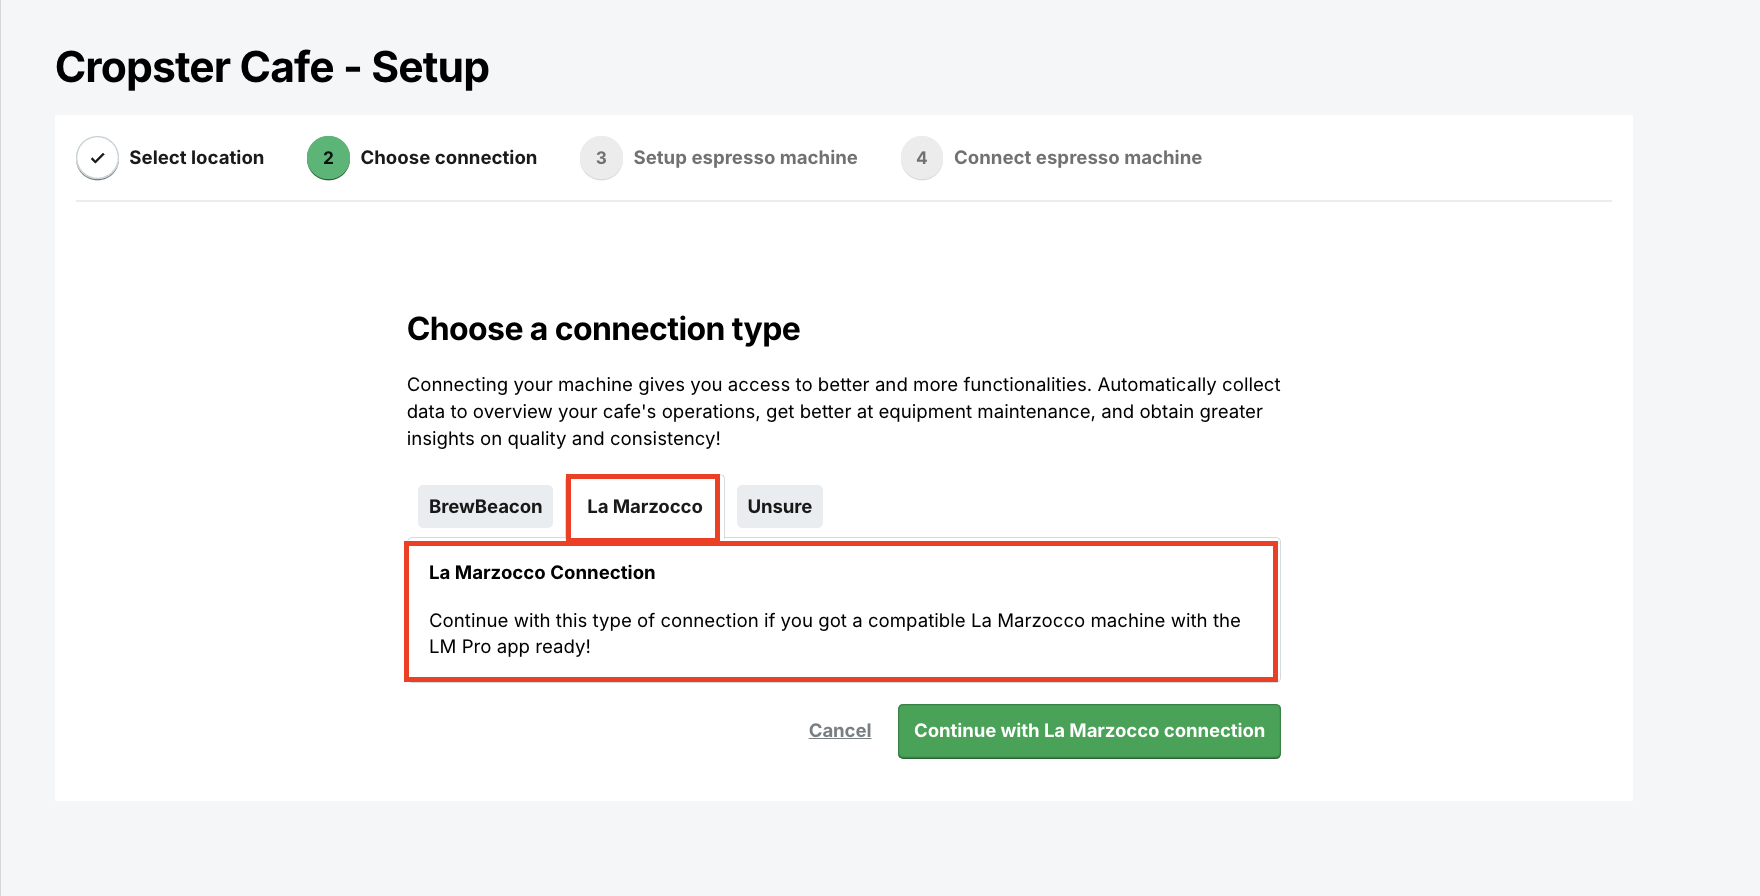
La Marzocco Pro App connection: Continue with this type of connection if you have a compatible La Marzocco machine with the La Marzocco Pro app ready.
-
Unsure: Choose this option if you are uncertain about the best method to connect your espresso machine to Cropster Cafe.
If you continue with this option, you can still add an espresso machine after clicking on the green Continue with setup espresso machine button.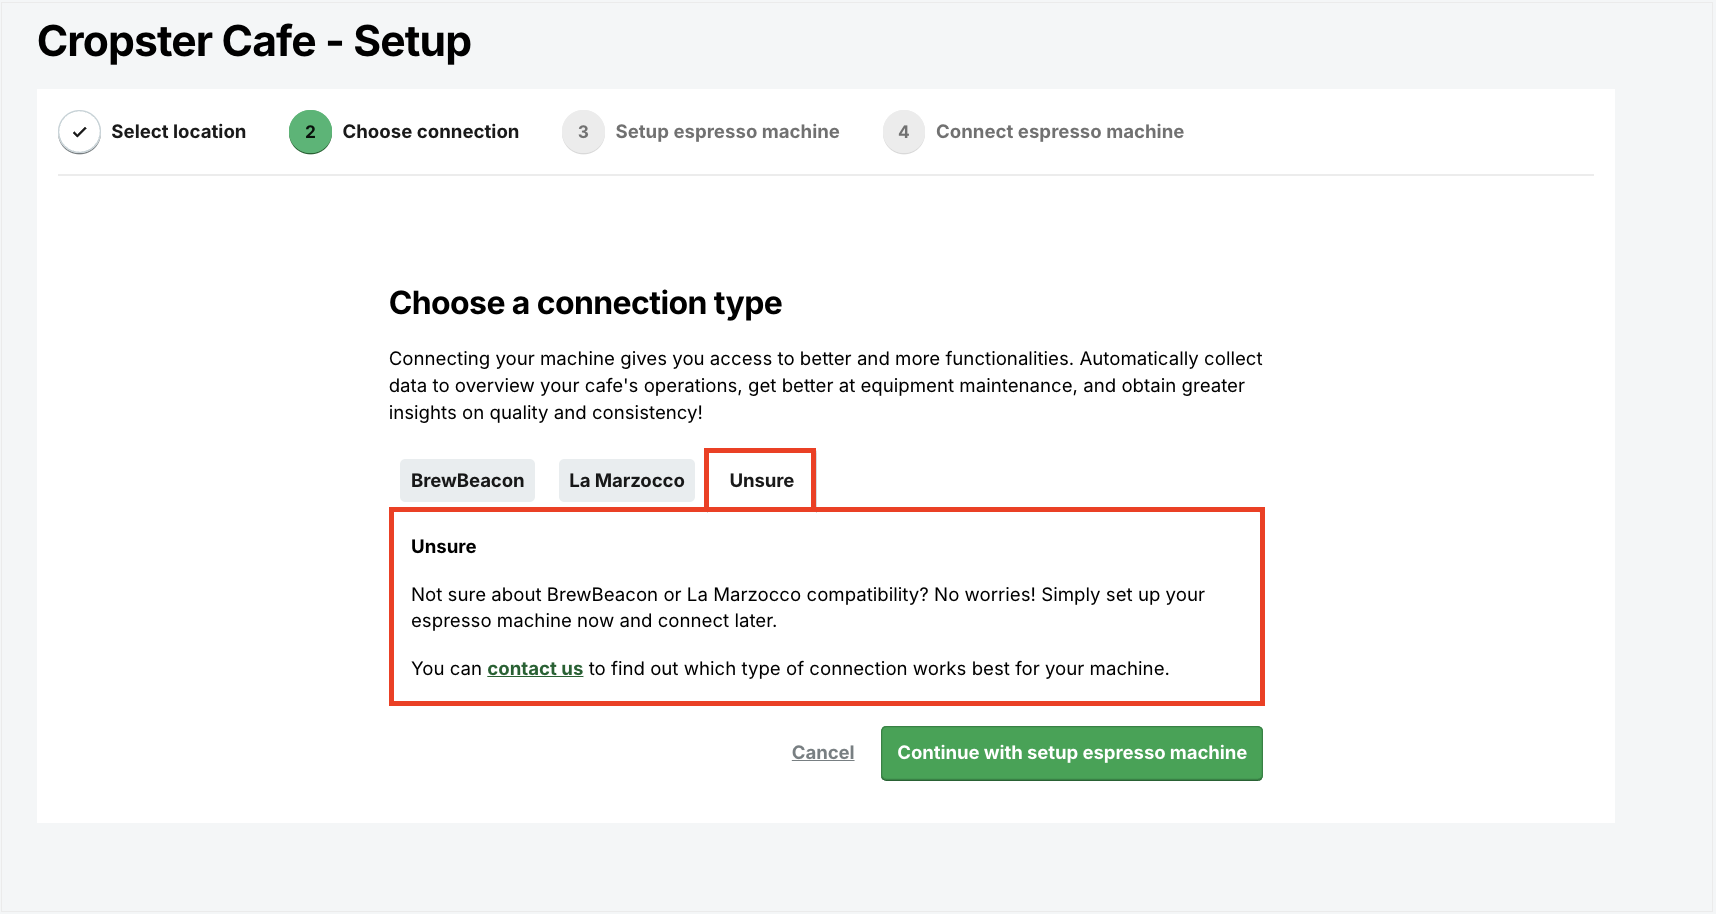
Setting up the espresso machine
You can either select an existing espresso machine or set up a new machine.
BrewBeacon connection
All BrewBeacon-compatible espresso machines associated with your selected location will be displayed automatically.
Before proceeding with the BrewBeacon installation, please ensure that your network and WiFi passwords consist solely of characters from the Roman alphabet.
After selecting either an existing machine or setting up a new one, you will be asked to verify the details of the selected machine to ensure that all information is accurate.

Setting up a new machine
-
Enter the following details:
* Indicates mandatory fields.
- *Brand
- *Model
- *No. of Groupheads
- *Serial number
- Alternative name
- *Location
- Stations: Stations enable you to group equipment.
- Comment
- Click on Continue.
Connecting the espresso machine
BrewBeacon connection
The BrewBeacon hardware needs to be installed on your espresso machine by following the installation guide. You will find the pairing code on this page that you need for the installation.

After clicking ‘Got it’, you will land on the Espresso Machine details page.
If the BrewBeacon is not connected, the machine will not appear as “Online”. After completing the connection steps, refresh the page to display the connected machine.
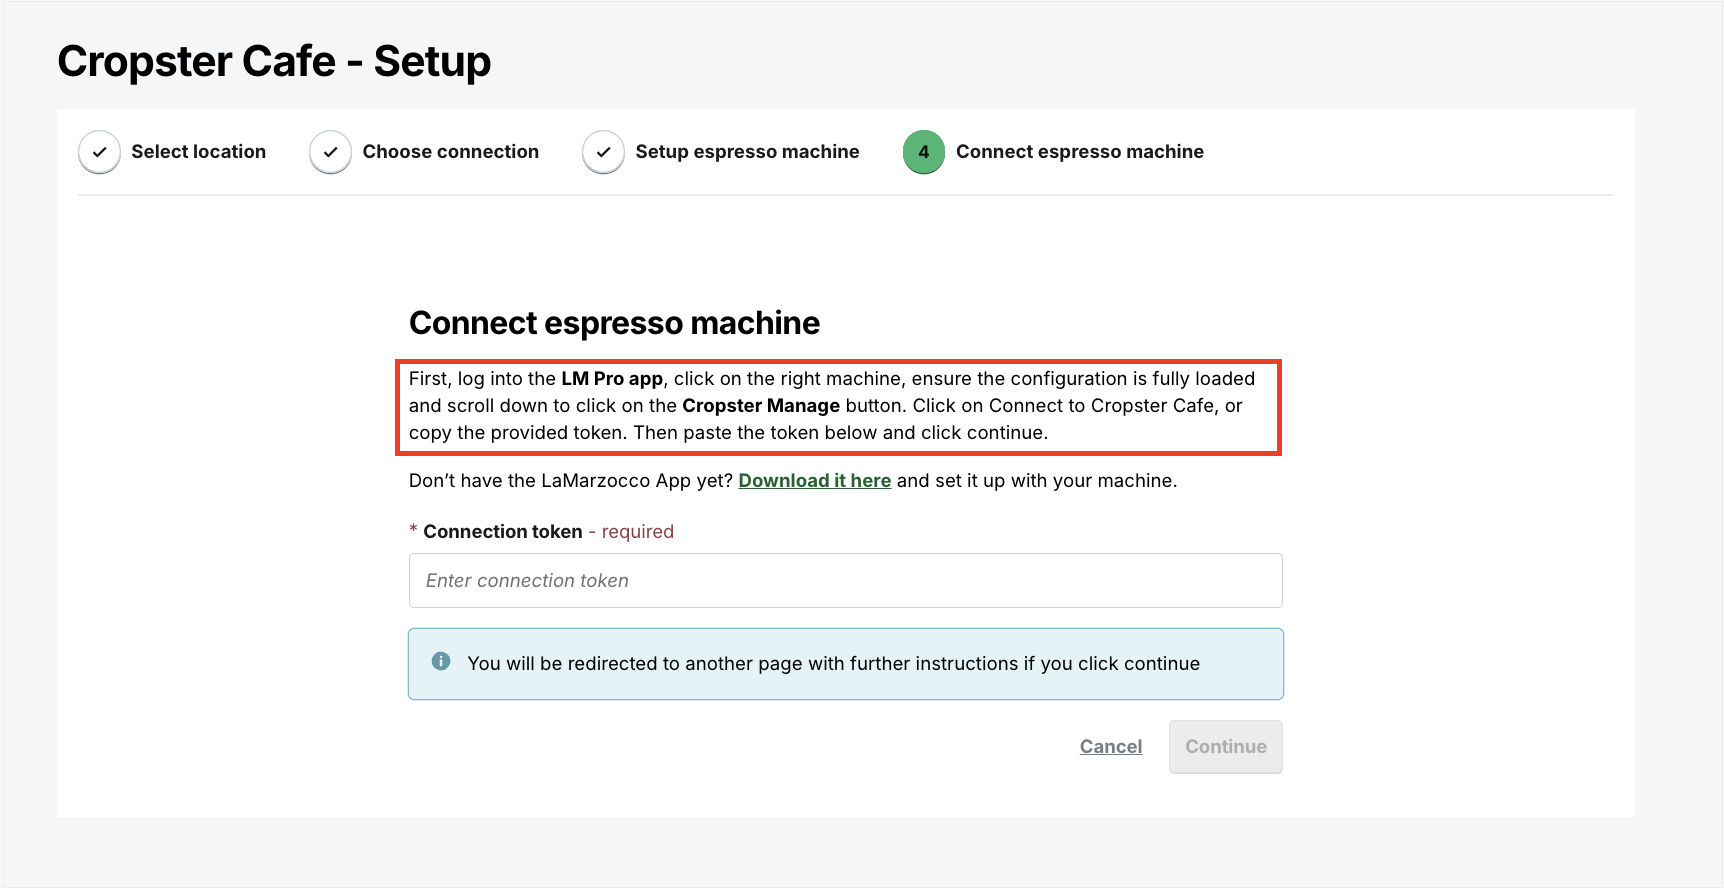
La Marzocco Pro app Connection
- First, log in to the LM Pro app, click on the right machine, ensure the configuration is fully loaded, and scroll down to click on the Cropster Manage button.
- Click on Connect to Cropster Cafe, or copy the provided Connection token.
-
Paste the token below and click Continue.
Creating Recipes
Recipes are the core of Cropster Cafe and a vital resource of information for Telemetry Insights.
- Navigate to Cafe.
-
Navigate to the Telemetry Insights tab and select Recipes.

-
Click +Add New Recipe on the top right side of the page.

-
Enter the following details:
* Indicates mandatory fields.- Recipe name
-
*Brewing method
- Espresso: When selecting Espresso as your brewing method, it is essential to specify the correct *Number of shots as well.
- Batch brew
- Manual brew
- Cold brew
- Countries of origin
- Varieties
- Processing methods
- Locations: Including Location details in your Recipes is highly recommended.
- Recipe Comment
-
Recipe ranges
- Dose (Minimum - Maximum)
- Yield (Minimum - Maximum)
- Brew ratio (Lower boundary - Upper boundary)
- Time: The time should be entered in minutes and seconds. For instance, if you want to specify 27 seconds, you should input it as 00:27.
- Temperature
- Descriptors
-
Click Create recipe to submit.
By selecting "Save as a draft," you can save your Recipe for future editing, allowing you to revisit and refine it later.
Assigning Recipes to Groupheads/Buttons
- Select Cafe > Assets.
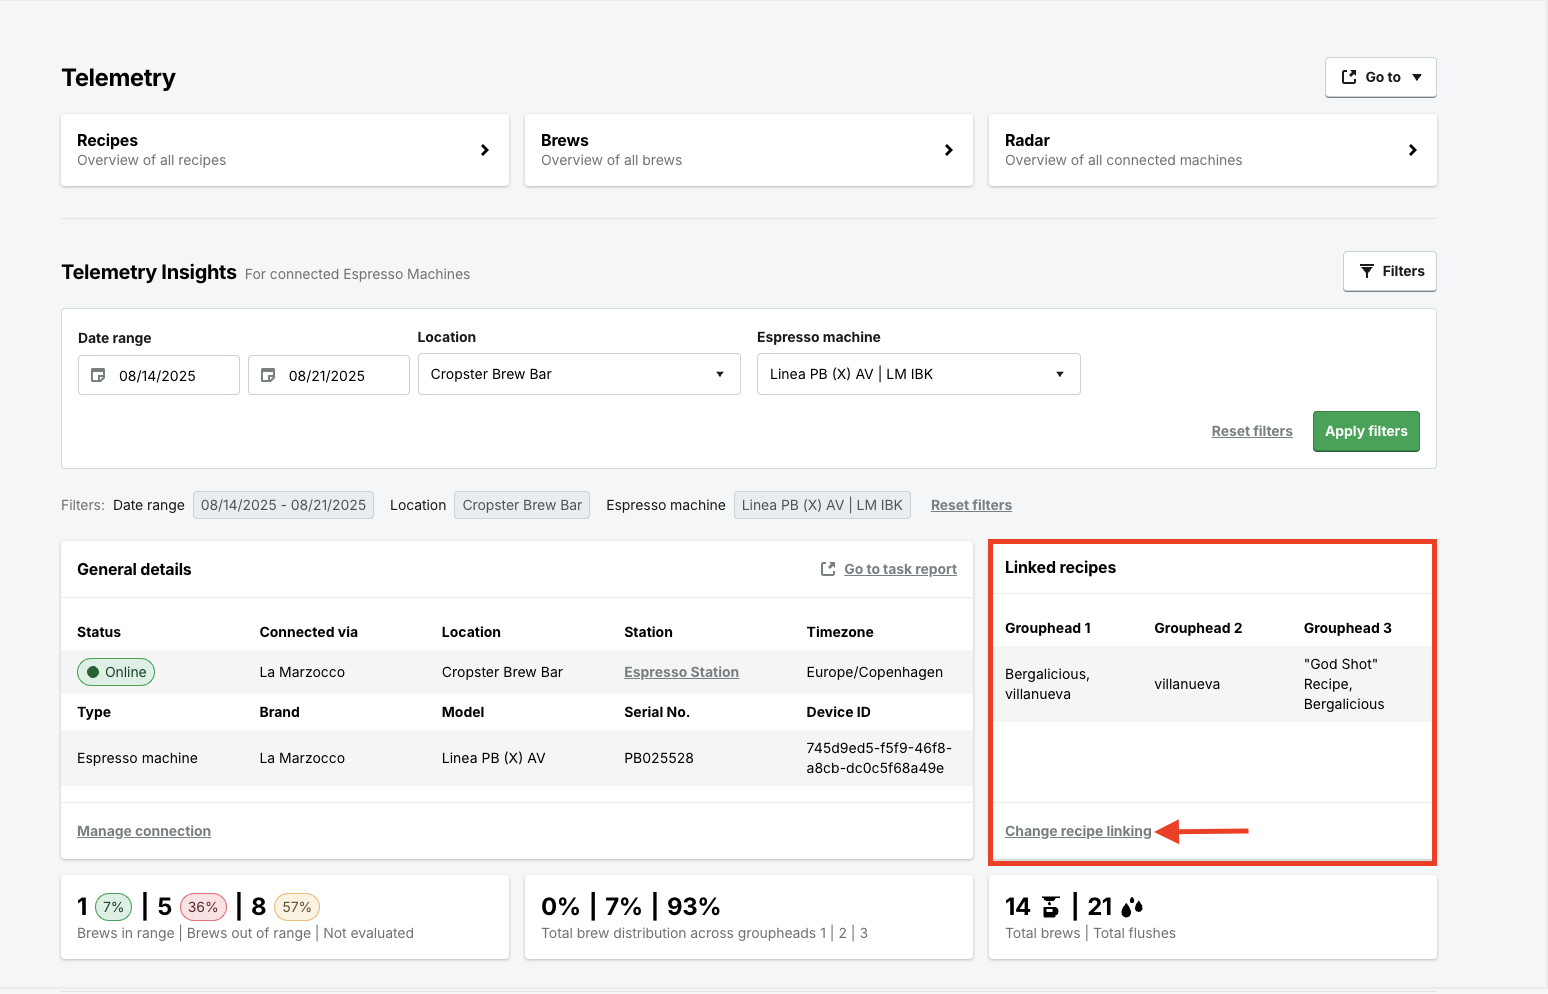
- Choose the Equipment you wish to link the Recipe to by clicking on its Model name. You will be directed to the Telemetry Insights page.
-
Click the Change recipe linking button on the right side of the page.
-
You will be directed to the selected Model's detail page. Scroll down to the Recipe tab and click on the green Link recipe button.
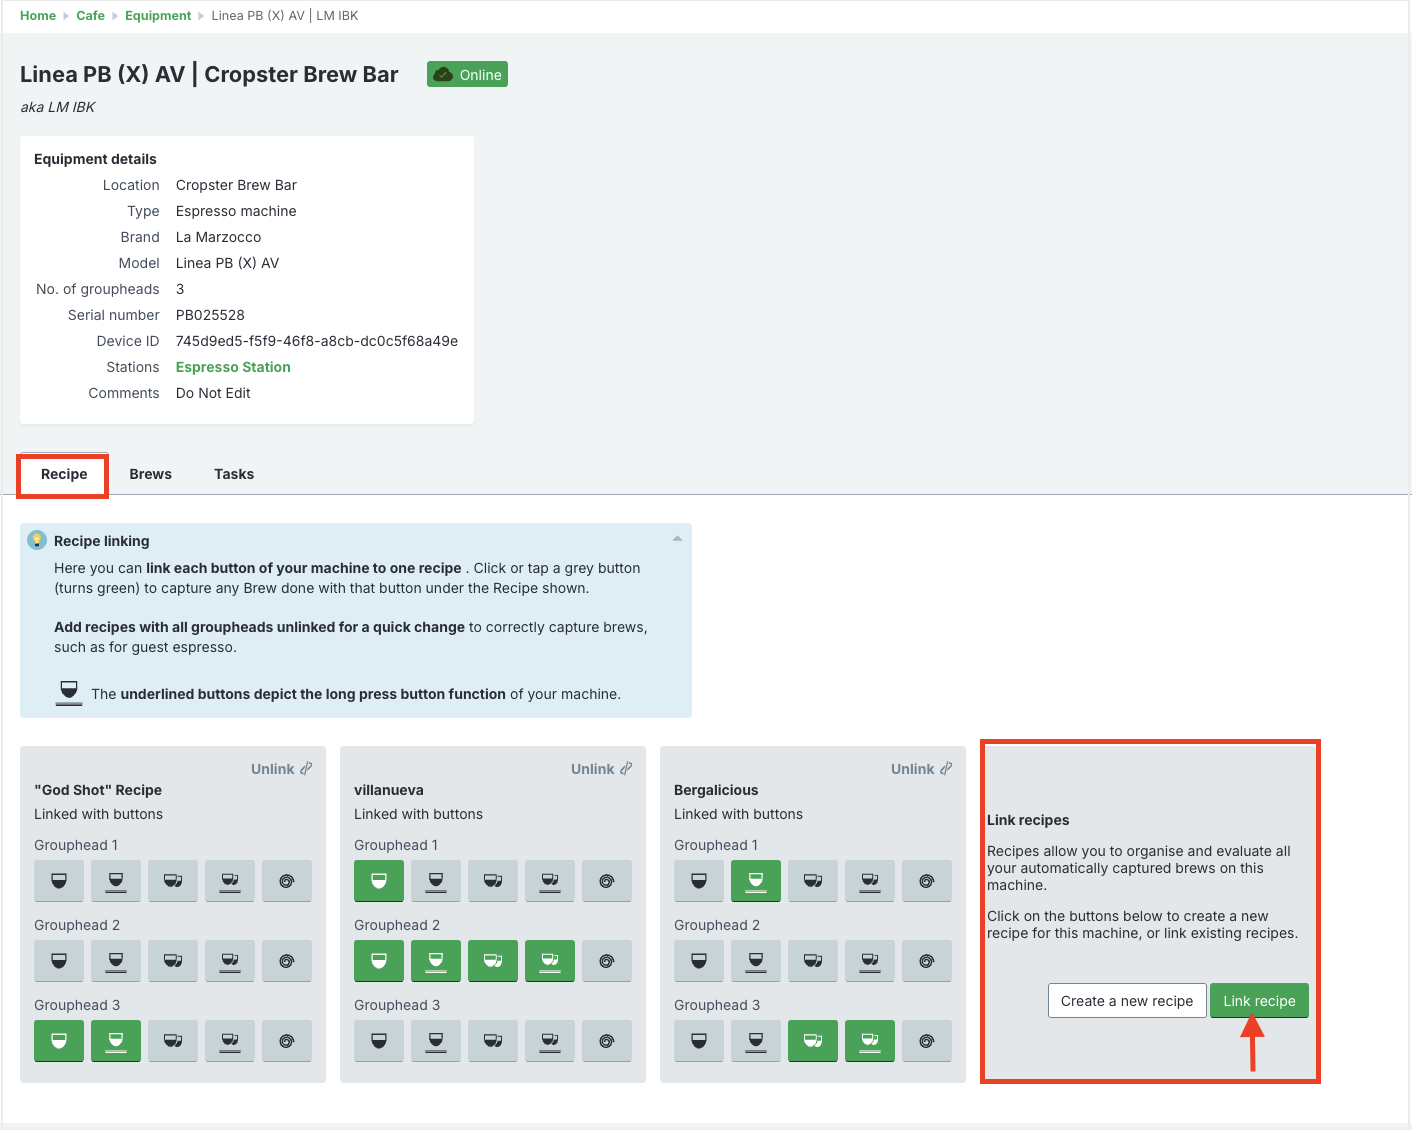
- Select the dropdown menu labeled "Choose a Recipe to link" and pick the Recipe you would like to associate with this machine.
-
Based on the type of connection established with your machine, you will have the option to include specific details such as:
- In case of BrewBeacon: Groupheads
- In case of La Marzocco: Groupheads and Buttons
- Click the Link recipe to finalize.
(Optional) Creating a Reference Brew
- Select Cafe > Assets.
- Choose the Equipment you wish to link the Reference Brew to by clicking on its Model name. You will be directed to the Telemetry Insights page.
- Click the Change recipe linking button on the right side of the page.
-
Switch to the Brews tab. You can determine if a Reference Brew has not been added to the Recipe by checking if the Dose field is blank.
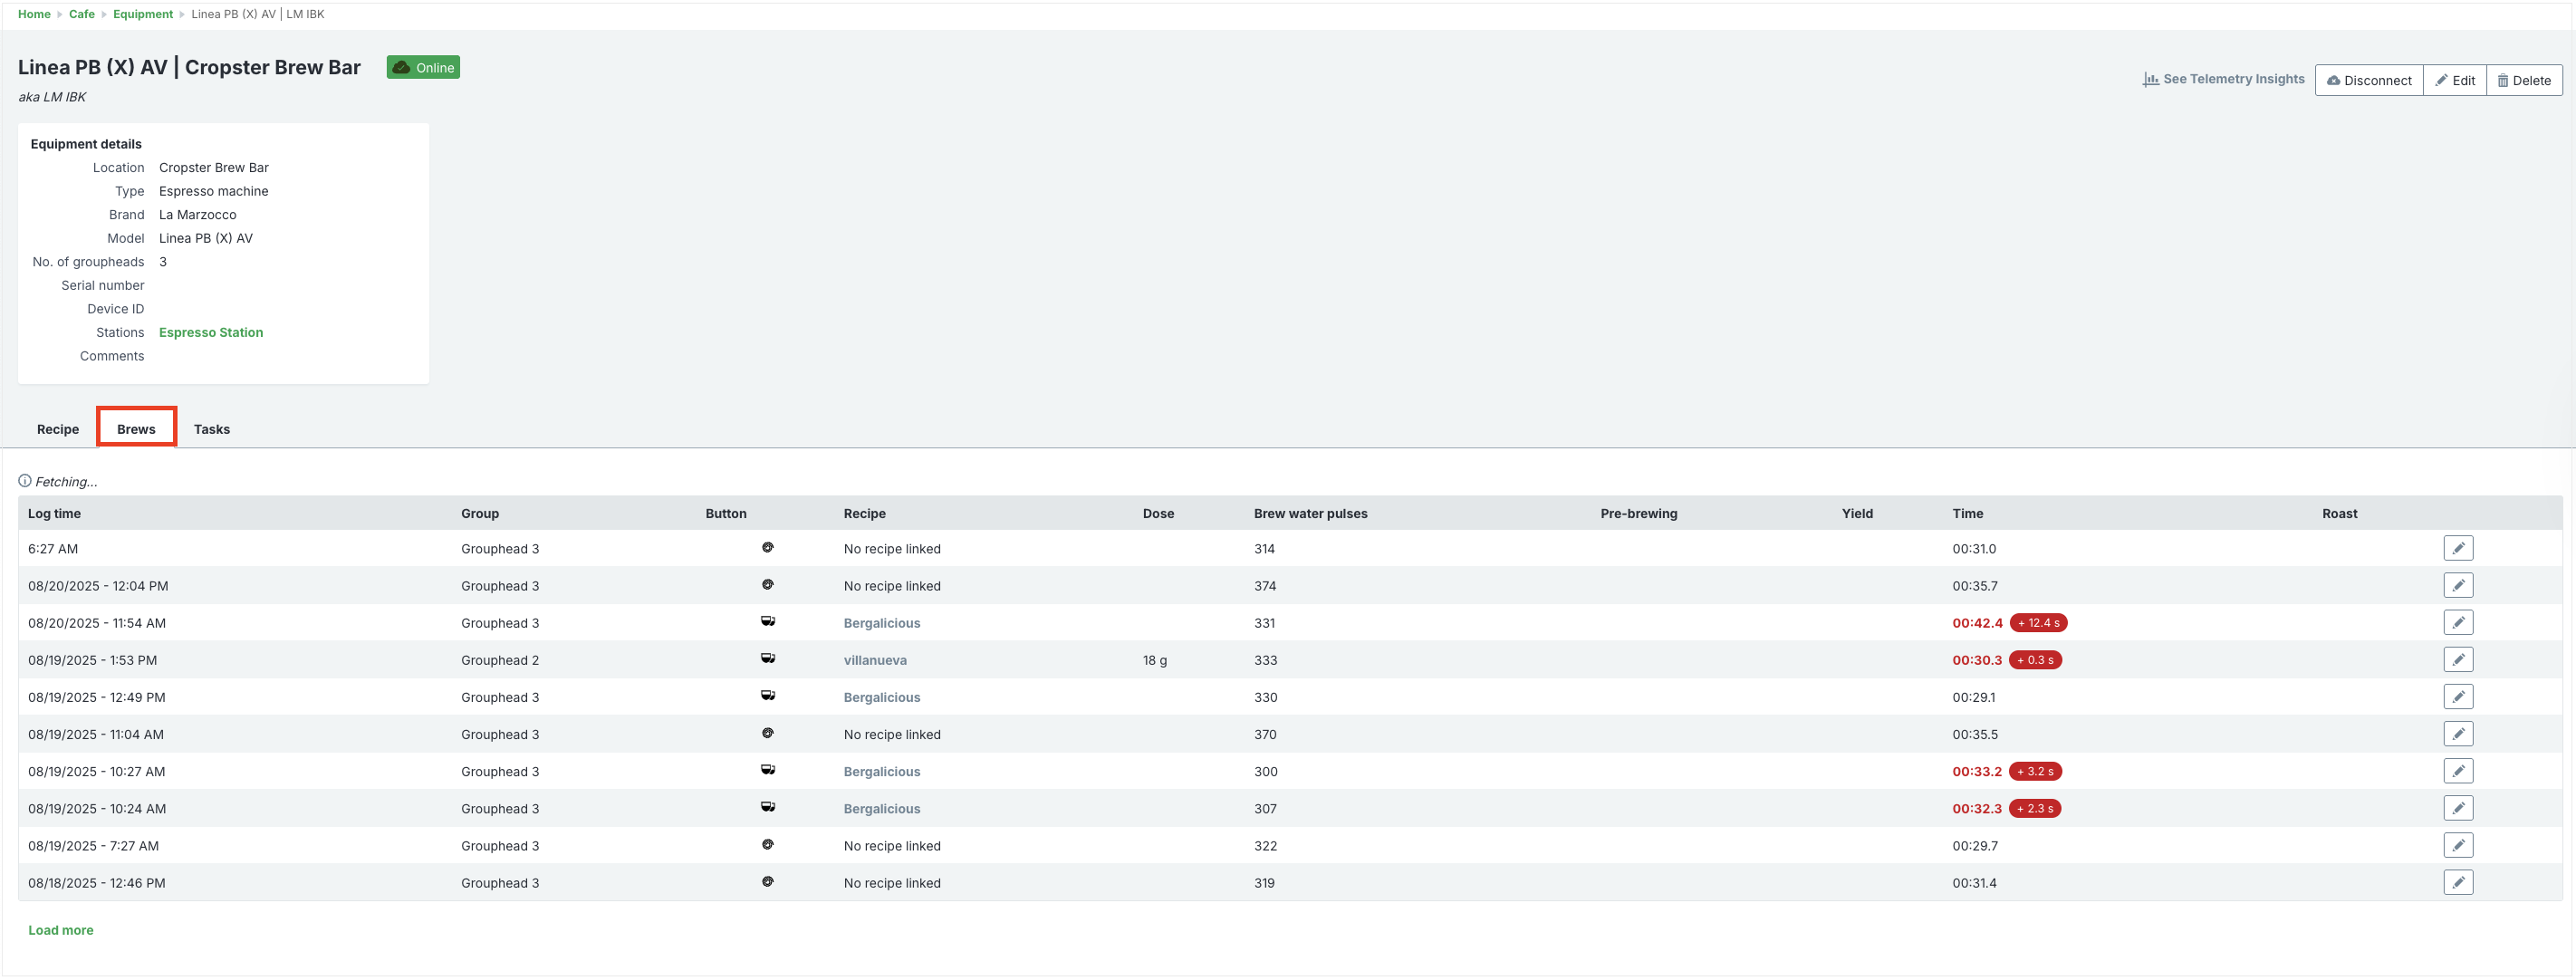
-
Click on the Recipe's name to view the Brews.

- (Optional) Refine your search by filtering the Brews based on the specific Location.
- Check the Recipe parameters and mark the most accurate one as the Reference Brew.
-
Click the star icon to set it as a Reference Brew.
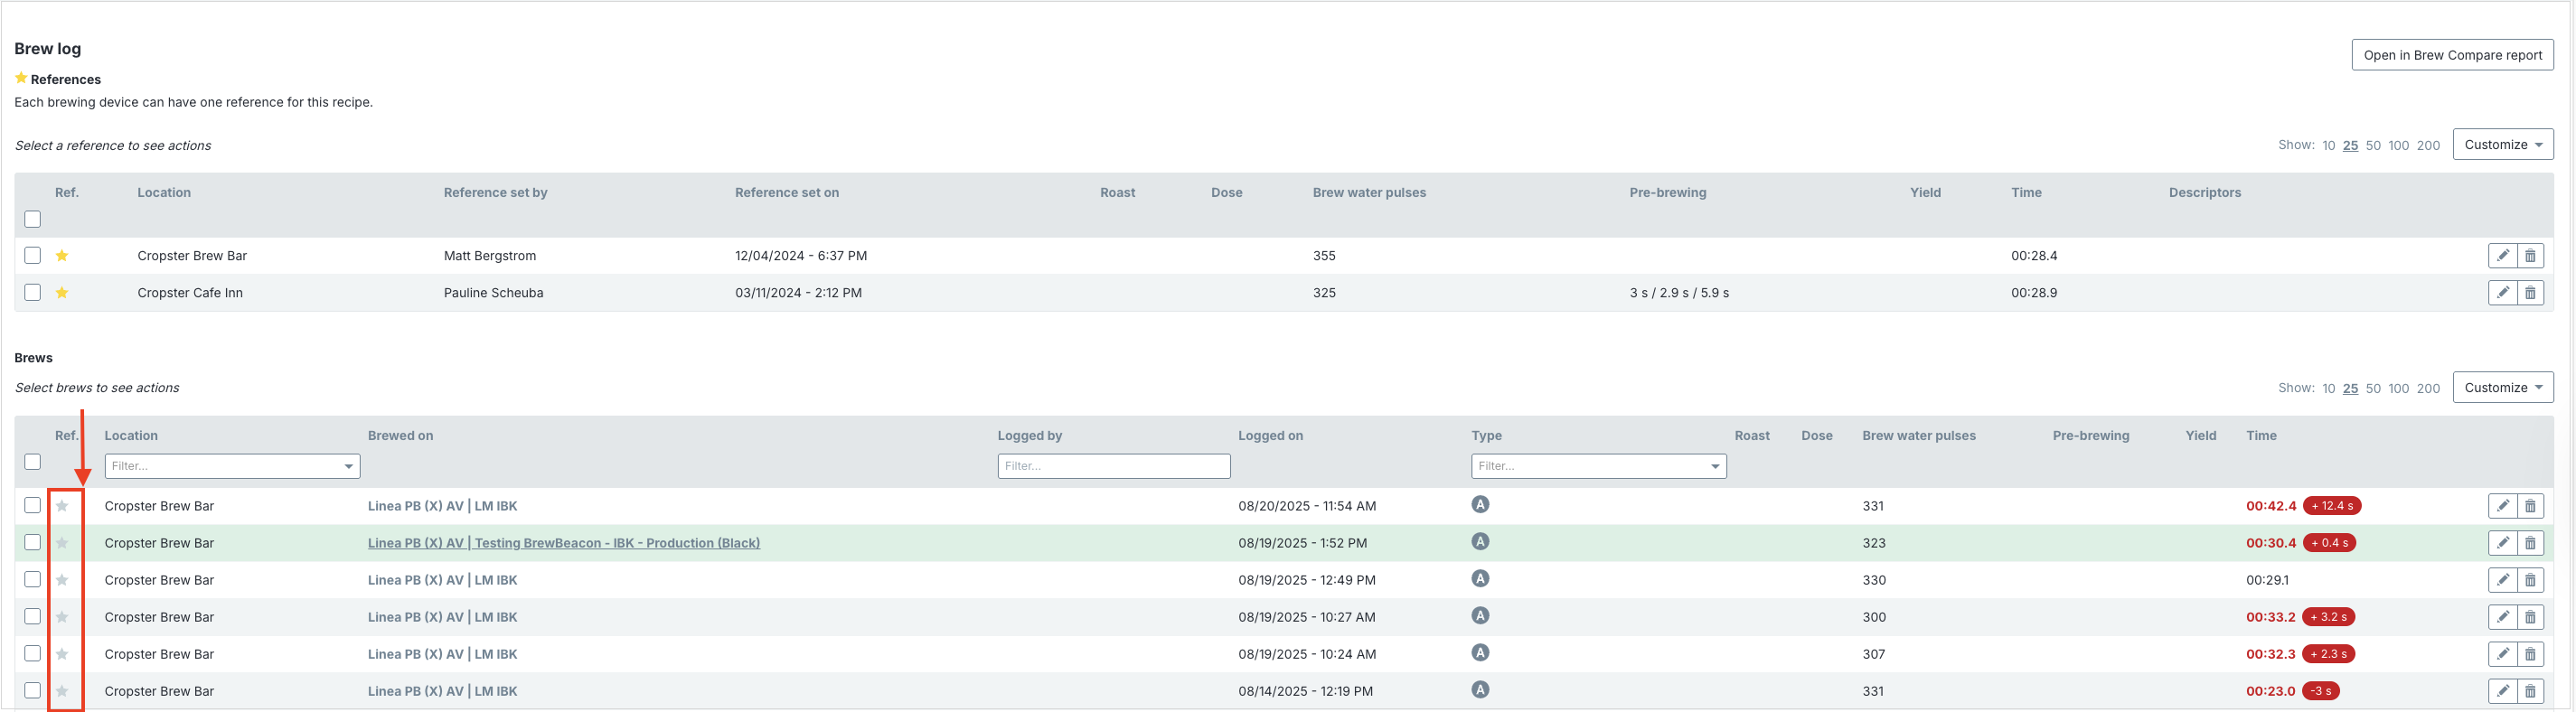
-
The Brew will be added to the list of References.
FAQs
I already have another Cropster subscription and just recently added Cafe to my account. How to begin?
To begin using Cropster Cafe, add an espresso machine to your account.
If you have further questions, feedback, or concerns, please submit a support ticket directly from support.cropster.com.